


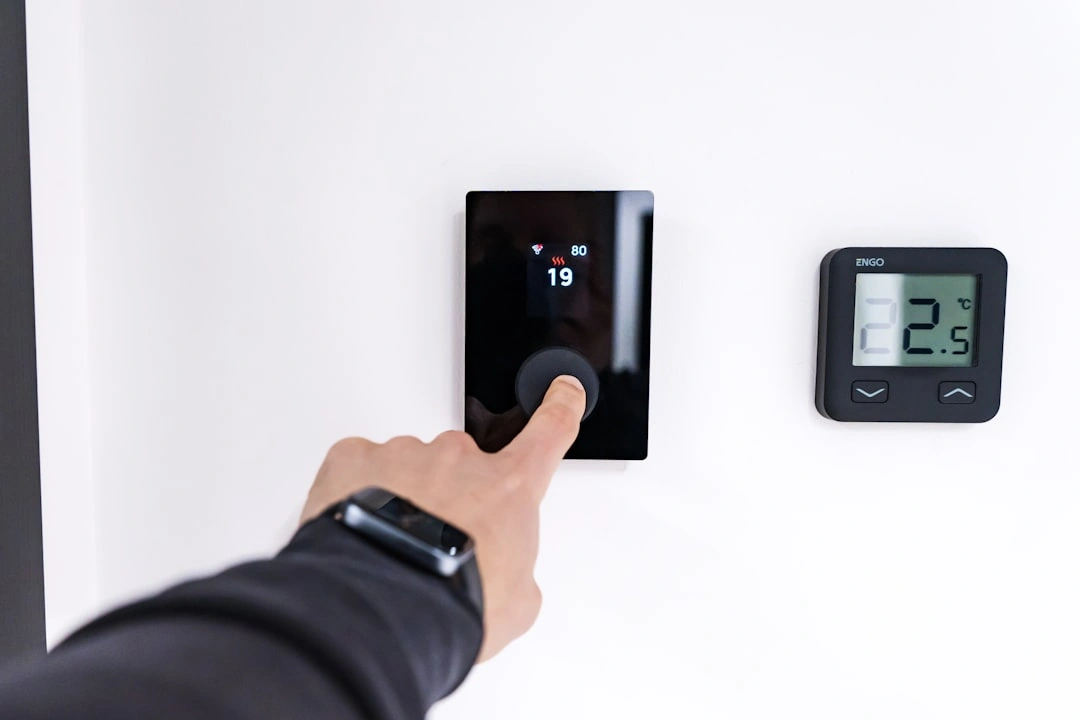

Why AC Troubleshooting Before Calling a Pro Can Save You Time and Stress
AC troubleshooting before calling a pro is something every South Jersey homeowner should know how to do — especially when temperatures spike in June and your system picks the worst possible moment to quit. The good news? Over 80% of AC breakdowns come down to preventable issues like a dirty filter, a tripped breaker, or a simple thermostat setting that got bumped out of place.
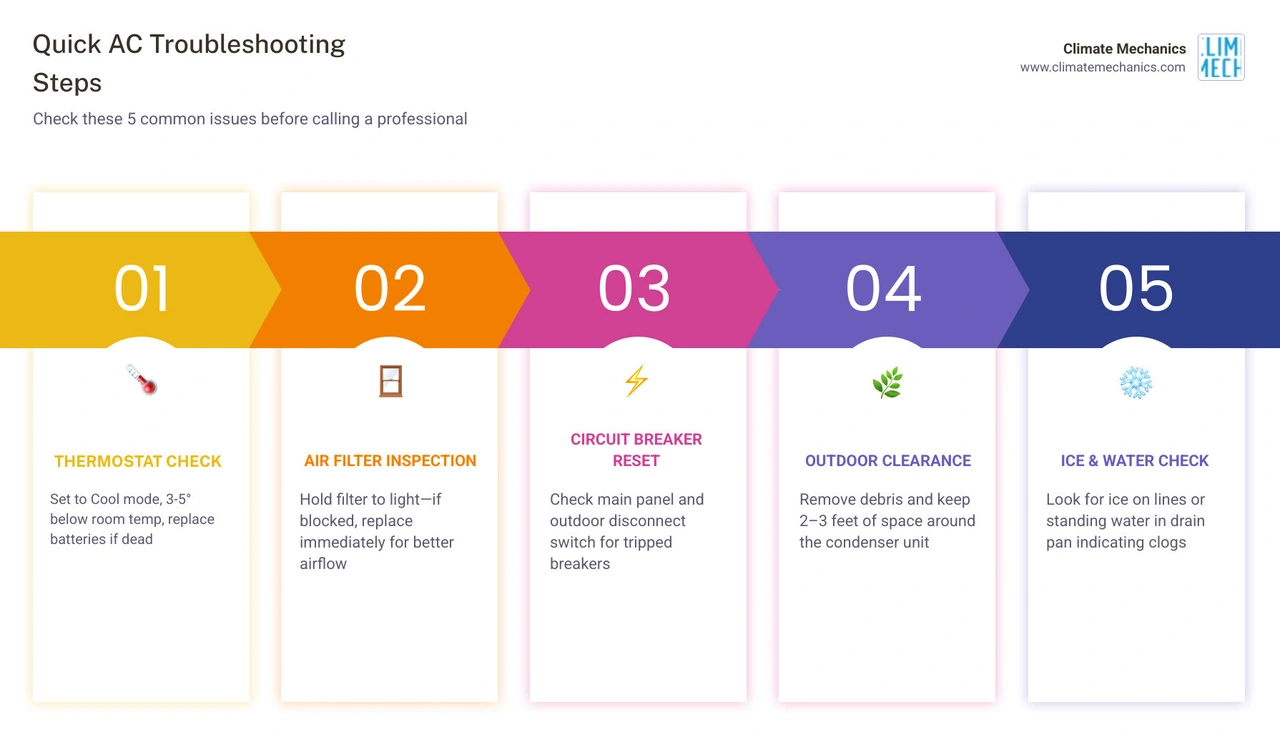
Before you wait hours for a technician, run through these quick checks first:
1. Check the thermostat — Make sure it's set to Cool mode, the temperature is at least 3–5 degrees below the current room temperature, and the batteries aren't dead.
2. Inspect the air filter — Hold it up to a light source. If no light passes through, it needs to be replaced immediately.
3. Check the circuit breaker — Look for a tripped breaker in your main electrical panel and check the outdoor disconnect switch near your condenser unit.
4. Clear the outdoor unit — Remove any debris and make sure there's at least 2–3 feet of clearance around the condenser.
5. Look for ice or standing water — Ice on the refrigerant lines or water in the drain pan are signs of specific problems covered below.
If none of those resolve the issue, it's time to dig deeper — or call a pro. For a closer look at what typically goes wrong, see our guide to Common Problems with AC Units.
Most of the time, a few minutes of simple detective work is all it takes to get your system running again — no service call needed.
Essential AC Troubleshooting Before Calling a Pro
When your home starts feeling like a greenhouse, it is easy to assume the worst. However, modern central air conditioning systems are complex networks of electrical, mechanical, and airflow components. When one piece of the puzzle is slightly off, the entire system may shut down as a safety precaution. Understanding the basics of ac troubleshooting before calling a pro can save you from an unnecessary diagnostic fee and help you restore comfort to your home in a matter of minutes.
Nearly 80% of mid-season cooling complaints trace back to simple issues that do not require specialized tools to diagnose. Think of yourself as a home comfort detective. Your job is to rule out basic structural, power, and airflow roadblocks before concluding that your compressor has failed. If your system is running but failing to lower the temperature, you might be dealing with a classic symptom outlined in our detailed breakdown of Why Is My AC Blowing Warm Air.
Thermostat Settings and AC Troubleshooting Before Calling a Pro
It may sound simple, but many emergency service calls are resolved by adjusting the thermostat. Thermostats are the brains of your HVAC system, and they are highly sensitive to user error, loose wiring, and power fluctuations.
First, verify that your thermostat is set to Cool mode. It is common for a family member or guest to accidentally bump the system into "Heat," "Fan Only," or "Off" mode. Next, check the temperature setting. The programmed temperature must be set at least 3 to 5 degrees below the current indoor room temperature to trigger a cooling cycle. If the thermostat is set to 74°F and the room is currently 73°F, your air conditioner will remain idle.
Another frequent culprit is weak batteries. Many homeowners assume that because their thermostat's digital display is lit, the batteries are fine. In reality, weak batteries may power the LCD screen but lack the strength to send a 24-volt signal to the outdoor unit. If your display is dim, flashing a low-battery icon, or behaving erratically, replace the batteries immediately with fresh alkaline ones.
If your thermostat screen is completely blank, read our troubleshooting walk-through on AC Thermostat Not Working. If the display is active but the system ignores your inputs entirely, learn how to isolate the issue with our guide on what to do when your AC Not Responding to Temperature Adjustments.
Air Filter Maintenance and AC Troubleshooting Before Calling a Pro
If the thermostat is the brain of your AC, the air filter is its lungs. Air conditioning units do not actually "create" cold; they remove heat and moisture from your indoor air. They accomplish this by pulling warm air from your living spaces, passing it over a freezing-cold evaporator coil, and blowing the newly cooled air back through your supply registers.
When your air filter becomes packed with dust, pet dander, and South Jersey pollen, airflow is severely restricted. This lack of airflow causes a domino effect of system failures. Without enough warm air passing over the evaporator coil, the refrigerant inside the coil cannot absorb heat. The coil’s temperature rapidly drops below freezing, causing moisture to freeze directly onto the metal fins. Before you know it, you have a solid block of ice suffocating your system, which can cause your AC Running Constantly in New Jersey Summer Heat to struggle and eventually overheat.
To check your filter, turn off your system, slide the filter out, and perform the simple "light test." Hold the filter up to a light source. If you cannot see light passing through the pleated material, your filter is clogged and must be replaced.
Keep these industry facts in mind when managing your air filters:
• Breakdown Prevention: Clogged air filters are responsible for approximately 25% of all mechanical AC breakdowns.
• Energy Savings: Swapping out a dirty filter for a clean one can lower your system's energy consumption by up to 15%.
• MERV Ratings: For standard residential systems, stick to filters with a MERV rating between 8 and 11. While MERV 13+ filters are excellent for capturing fine particles, they can restrict airflow in standard residential ductwork, mimicking a clogged filter.
• Replacement Schedule: In South Jersey towns like Marlton or Audubon, local pollen counts and summer humidity mean you should check your filter every 30 days during peak cooling months. If you have multiple pets, you may need to replace 1-inch pleated filters as often as every 21 days.
Power and Electrical System Checks
If your air conditioner refuses to turn on at all—no hum, no blower fan, no outdoor action—you are likely dealing with a power delivery issue. Power supply problems account for roughly 30% of sudden air conditioner failures. Before you assume that a major component has burned out, perform a basic, safe audit of your home’s electrical switches.
To help you understand the boundaries of safe homeowner troubleshooting, review the comparison table below:
• Visually inspecting the main electrical panel — Professional Electrical Diagnostics (Call a Pro): Testing live high-voltage wires with a multimeter
• Resetting a tripped circuit breaker once — Professional Electrical Diagnostics (Call a Pro): Diagnosing and replacing a failed dual run capacitor
• Checking the outdoor disconnect switch handle — Professional Electrical Diagnostics (Call a Pro): Replacing pitted or burnt contactor relays
• Verifying indoor air handler power switches — Professional Electrical Diagnostics (Call a Pro): Probing internal control boards for shorts
• Testing and resetting GFCI outlets near the unit — Professional Electrical Diagnostics (Call a Pro): Rewiring damaged or shorted thermostat wiring
Your air conditioner runs on two separate electrical circuits. Your indoor air handler or furnace typically runs on a standard 120-volt circuit, while your outdoor condenser unit demands a heavy-duty 240-volt circuit. If either of these circuits loses power, the entire system will fail to function.
Start by checking your indoor air handler's power switch. This switch looks like a standard light switch and is usually mounted directly on the side of your furnace or utility closet wall in homes throughout Willingboro and Pennsauken. It is common for someone to mistake this for a light switch and flip it off by accident.
Next, inspect any Ground Fault Circuit Interrupter (GFCI) outlets located near your indoor or outdoor equipment. If a nearby outlet has tripped due to a moisture surge or a recent storm, it can cut power to the low-voltage transformer that runs your system's control wiring. Press the "Reset" button on any nearby GFCI outlets to see if power is restored. If your breaker panel is the source of the issue, learn more about why this happens by reading about what to do when your AC Circuit Breaker Keeps Tripping.
Resetting a Tripped Circuit Breaker Safely
If your air conditioning system suddenly goes dead after a hot afternoon or a local power surge, a tripped circuit breaker is the prime suspect. Modern HVAC systems draw a substantial amount of electrical current, especially when starting up against high outdoor temperatures.
To safely check and reset your circuit breaker, follow these steps:
1. Locate your main electrical panel: This is usually found in your basement, garage, or utility room.
2. Identify the correct breakers: Look for breakers labeled "AC," "Air Conditioner," "HP," or "HVAC." You may have a double-pole breaker for the outdoor unit and a single-pole breaker for the indoor unit.
3. Look for a tripped status: A tripped breaker will not be fully in the "On" position. Instead, it will be resting in the middle, or showing a small red indicator window.
4. Perform a complete reset: Do not simply push the breaker toward the "On" position. You must first flip it completely and firmly to the Off position until you hear a distinct click.
5. The 30-Minute Wait Rule: Once the breaker is fully off, wait at least 30 minutes before flipping it back to "On." This is a critical safety step. When an AC system shuts down abruptly, high-pressure refrigerant remains trapped inside the compressor. Attempting to restart the compressor immediately forces the motor to start against extreme head pressure, which can cause an electrical overload and instantly trip the breaker again. Waiting 30 minutes allows internal system pressures to safely equalize.
6. The Single Reset Limit: Flip the breaker firmly back to the "On" position. If the system starts up and continues to run smoothly, you likely experienced a temporary power surge. However, if the breaker instantly trips again, do not reset it a second time. Repeatedly resetting a tripping breaker can cause catastrophic damage to your compressor, melt electrical wiring, or even spark an electrical fire.
Don't forget to check the outdoor disconnect box, which is typically mounted on the exterior wall of your home right next to the condenser unit. Inside this weatherproof box, you will find either a pull-out metal T-handle or a heavy-duty switch. Ensure that this handle is pushed firmly into the "On" position. It is not uncommon for utility workers, painters, or landscapers to pull this disconnect while working on your home and forget to reinsert it when they finish.
Managing Airflow, Frozen Coils, and Drainage Solutions
If your system has power and is blowing air, but your home is steadily growing warmer, you are likely dealing with a physical restriction in either airflow or drainage. In South Jersey's humid summers, your air conditioner extracts gallons of water from the air every single day. Managing this moisture and keeping airflow pathways clear is essential to keeping your system running smoothly.
When airflow is restricted, your system's evaporator coil can quickly drop below freezing, turning into a solid block of ice. If you notice weak airflow coming from your vents, or if you spot ice forming on the brass valves or copper lines connected to your outdoor unit, your system is frozen. For a deep dive into why this happens and how to prevent it, read our guide on AC Freezing Up What to Know.
If your air conditioner is rapidly turning on and off every few minutes without actually cooling your home, this is known as short-cycling. This behavior is incredibly hard on your compressor and can be caused by a variety of issues. You can diagnose this specific problem by exploring our guide on why your AC Keeps Turning On and Off in New Jersey Summer Heat What Is Wrong.
Clearing a Clogged Condensate Drain Line
As warm, humid air passes over your indoor evaporator coil, water condenses on the cold metal surfaces and drips down into a sloped drain pan beneath the unit. From there, the water flows through a PVC condensate drain line and is safely channeled out of your home or into a nearby floor drain.
Because this drain line is constantly wet and dark, it is a perfect breeding ground for algae, mold, and bacterial slime. Over time, this biological buildup forms a thick clog. If the water cannot drain, it will quickly overflow the pan, leading to water damage in your ceilings or basement.
To prevent this, modern HVAC systems are equipped with a safety float switch. This small plastic device is installed directly on your drain line or drain pan. When water levels rise dangerously high, a floating mechanism rises, opening the electrical circuit and instantly cutting power to your outdoor condenser unit to prevent a flood. Homeowners often mistake this safety shutdown for a catastrophic compressor failure.
If you suspect your drain line is clogged, you can easily clear it using a standard household wet/dry vacuum:
• Locate the exit point of your PVC condensate line outside your home (usually near the outdoor condenser unit).
• Wrap a clean rag around the end of the PVC pipe to create a tight seal, and insert the hose of your wet/dry vacuum over it.
• Turn the vacuum on and let it run for 1 to 2 minutes. This will safely pull the clog, standing water, and accumulated algae out of the line.
• To keep your drain line running freely, head inside to your indoor unit's drain line access port (usually a T-shaped PVC pipe with a removable cap). Pour a quarter-cup of ordinary distilled white vinegar down the line once a month during the cooling season. The natural acidity of the vinegar will kill off any developing algae and biofilm before it can form a clog.
Cleaning the Outdoor Condenser Unit Safely
Your outdoor condenser unit is responsible for releasing all the heat that was extracted from inside your home. To do this efficiently, the outdoor fan pulls large volumes of outdoor air through thousands of tiny aluminum fins that surround the unit.
Over the course of a spring and summer in towns like Haddonfield or Collingswood, these delicate fins act like a magnet for grass clippings, fallen leaves, dirt, and windblown debris. When these fins become blanketed in grime, the heat remains trapped inside the refrigerant, forcing your compressor to work twice as hard and run much hotter than it was designed to.
To safely clean your outdoor condenser, follow these steps:
1. Shut off the power: Pull the outdoor disconnect plug or switch off the AC breaker in your main electrical panel. Never attempt to clean the unit while the fan is capable of turning on.
2. Clear the surrounding area: Maintain a strict 2-to-3-foot "dead zone" around all sides of your outdoor unit. Cut back any overgrown bushes, trim low-hanging tree branches, and pull any weeds growing around the base. Your unit needs plenty of breathing room to exhaust heat.
3. Rinse the coils gently: Attach a standard spray nozzle to your garden hose. Set it to a gentle "shower" or "spray" pattern. Never use a pressure washer. The high-pressure stream of a pressure washer will instantly bend and crush the delicate aluminum fins, permanently blocking airflow and causing expensive, irreversible damage.
4. Spray from the top down: Direct the water stream through the wire grates, spraying from the top down to wash away accumulated dirt and debris. If you notice any bent fins, you can purchase a cheap "fin comb" from a local hardware store to gently straighten them back into place.
When to Stop DIY and Call a Professional
While basic troubleshooting can resolve a surprising number of common cooling issues, there is a very clear line where homeowner DIY efforts must stop for the sake of safety and system longevity. Trying to tackle complex mechanical or electrical repairs without the proper training, diagnostic tools, and safety equipment can result in severe personal injury, voided equipment warranties, or a completely ruined system.
Federal law under EPA Section 608 strictly prohibits unlicensed individuals from handling, charging, or recovering chemical refrigerants. If your system is low on refrigerant, it means you have a leak in your sealed system. Adding more refrigerant without finding and sealing the leak is not only illegal, but it will also eventually destroy your compressor.
If you have completed the basic checks and your home is still warm, it is time to look for professional help. You can learn about the clear warning signs that require a certified technician by reviewing our guide on Professional AC Repair Indicators. If you are unsure whether your system needs a quick fix or an expert diagnosis, look over our list of Signs You Need Expert AC Repair. For a broader understanding of how to protect your investment, check out our comprehensive overview of Signs AC Unit Needs Professional Attention and learn exactly When to Call Our HVAC Technicians.
Recognizing Serious Mechanical and Electrical Failures
Some symptoms point directly to severe internal component failures that require immediate professional intervention. If your circuit breaker trips the moment your outdoor unit attempts to start up, you are likely dealing with a "hard-starting" compressor or a shorted motor winding. Continuing to reset the breaker can cause the compressor to seize completely.
If you ever detect a distinct burning odor coming from your indoor vents or your outdoor unit, turn off your system at the thermostat immediately. A burning smell usually indicates that a blower motor is overheating, electrical wiring has melted, or a contactor relay has seized and is actively burning.
Similarly, if you see sparks, smoke, or physical damage to the electrical components inside your outdoor unit, do not attempt to investigate. These are clear indicators of high-voltage failures. To protect your home's expensive cooling system, read our guide on AC Compressor Problems Warning Signs and familiarize yourself with these Immediate HVAC Repair Signs so you can react quickly.
Identifying Unusual Noises and Smells
Your air conditioner should operate with a gentle, predictable hum and the quiet rush of moving air. When it starts making strange noises or emitting unusual odors, it is trying to tell you that something is seriously wrong inside.
Pay close attention to these warning sounds and smells:
• Hissing or Whistling: A persistent hissing sound near your indoor coil or outdoor unit usually indicates a high-pressure refrigerant leak. Turn the system off immediately to prevent all of your refrigerant from escaping into the atmosphere.
• Grinding or Screeching: Metal-on-metal screeching or loud grinding noises point directly to dry, failing bearings in your indoor blower motor or outdoor condenser fan motor. If left running, the motor will eventually seize, which can overheat the system and burn out adjacent electrical components.
• Banging or Clanging: If you hear a loud clanging sound inside your outdoor unit, a fan blade may have bent, or a compressor mount may have broken loose, allowing the heavy compressor to rattle against the metal housing.
• Musty or Sour Odors: A musty smell coming from your vents indicates that mold, mildew, or biofilm has taken hold in your condensate pan or along your evaporator coil. This requires a professional deep cleaning to protect your family's indoor air quality.
If you are hearing or smelling anything out of the ordinary, take a moment to read our troubleshooting guide on how to Spot Signs Air Conditioning Trouble before a minor issue turns into an expensive system replacement.
Frequently Asked Questions about AC Troubleshooting
Why is my AC running but not cooling the house?
If your system is running constantly but failing to lower the temperature, the most common cause is a severe restriction in airflow, usually due to a heavily clogged air filter or a thick layer of dirt covering your outdoor condenser coils.
First, replace your air filter and gently rinse your outdoor unit. If airflow is clear and the system still isn't cooling, you may have a frozen evaporator coil or a low refrigerant charge caused by a leak. Turn the system off to let it thaw, and call a professional to leak-test your system.
How long should I wait to restart my AC after a power outage?
You should always wait at least 30 minutes after power is restored before turning your air conditioner back on. When power cuts out abruptly, high-pressure refrigerant gas remains trapped inside your compressor.
Attempting to restart the system immediately forces the compressor motor to start against this extreme pressure, which can easily overload the electrical circuit, trip your breaker, or damage the motor windings. Waiting 30 minutes allows these internal pressures to safely equalize, protecting your compressor from premature failure.
What should I do if my AC evaporator coil freezes up?
If you spot ice on your indoor evaporator coil or the copper refrigerant lines outside, take these steps immediately:
1. Turn your thermostat from "Cool" to Off.
2. Switch your thermostat's fan setting from "Auto" to On. This keeps your indoor fan running while the cooling is turned off, pulling warm indoor air across the frozen coil to melt the ice safely.
3. Allow 4 to 6 hours for the ice to melt completely. Never use a hair dryer, heat gun, or sharp objects to scrape ice off the coil, as you can easily puncture the copper lines and release refrigerant.
4. While the system is thawing, inspect your air filter and replace it if it is dirty. Once the ice is completely gone and you have a clean filter in place, try running the system again. If it freezes up a second time, you likely have a refrigerant leak or a failing blower motor that requires professional repair.
Conclusion
Taking a few minutes to run through these safe, basic AC troubleshooting steps can save you time, stress, and unnecessary service fees during the peak of summer. Many common cooling issues can be resolved with nothing more than a fresh set of batteries, a clean air filter, or a quick flip of a circuit breaker.
However, when simple DIY fixes aren't enough, you need an HVAC team you can trust to get the job done right. At Climate Mechanics, we bring over 38 years of NATE and NCI-certified expertise to every home we serve throughout South Jersey, including Pennsauken, Marlton, Audubon, Willingboro, Collingswood, Haddonfield, Burlington, Maple Shade, and Camden. We pride ourselves on delivering personalized, honest service with transparent communication.
If your air conditioner is still acting up after walking through this guide, do not suffer through the heat. Schedule your professional air conditioning service today and let our experienced team restore reliable comfort to your South Jersey home.
